Before we get into how-to, I thought I spend a little time talking about the MVBlocks that are included with Civil 3D 2010. What you see in plan view can look very different in 3D view. These can work to our advantage in our Civil drawings.
 MVBlocks are not loaded on the palette by default - you have to hunt for them a bit. Luckily, its simple! You can open up the Tool Palette on the ribbon by the Home tab and Palettes panel. Select the second little icon. You can also use the shortcut CTRL+3 to open it up.
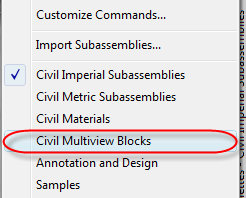
Right-click on the grey part of the panel that says Tool Palettes - (and then whatever type you are using; Imperial or Metric). Once you Right-click on that, click on Civil Multiview Blocks. Your Tool Palette will change. When you click on an MVBlock, Civil 3D will prompt you for an insertion point. This is nominally the center of the tree.
There are quite a number of MVBlocks that you can bring into your drawings. Cars, People, Playground equipment, and of course trees.
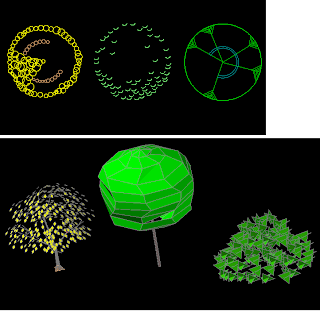
A couple words of advice though
- Some of the MVBlocks are NOT 3D from the standpoint of us bringing in the block and viewing it via the Object viewer as indicated below. Case in point. Bring in any of the Deciduous Trees (large or small). They look fine in plan view but when you object view them, they look like some sort of abstract art (or from my eye - an extruded X).
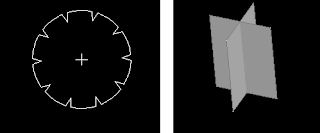
- Some of the blocks come into your drawing at strange scales so if you really wish to use that block, you will have to do some experimenting. Case in point are the Deciduous Trees, Concept Trees, and Detail Trees. I'm not sure why they come in at these sizes but mine (and others) guesses are that they are throwbacks to the old DCA blocks.
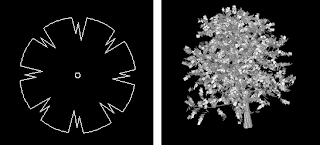
- The Landscape MV Blocks all come in at a scale of 1 which is desirable since we can then scale the X and Y factor to the canopy width, and use the Z factor as the desired viewing height.
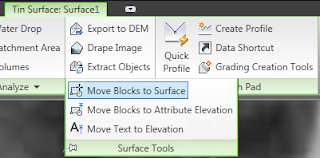
So now that you have all these nice blocks into your drawing, how do you get them to show as they are on the surface? Very simple!
Click on the surface you wish to place the block on. The ribbon will change to a contextual state; that is all of the items in the ribbon are related to that surface only. Nice!
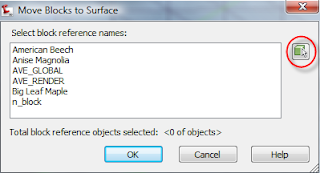
On the Surface Tools panel, click the drop-down arrow next to the Surface Tools. The menu will expand, showing you 'Move Blocks to Surface'. A dialog will pop up showing you all the blocks you have in your drawing. If you know the block names, you can select them from the list, otherwise, use the picker and pick the blocks individually.
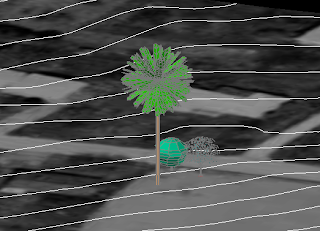
Once you're done with that, pick your surface and the trees and Object view them. You now have planted your trees!
I hope that each of use takes the time to actually go out and plant a tree, or do something outside in honor of Arbor day. If you cannot, well at least you've planted 'pixel trees' and your clients will like the additions to your renderings. Happy Arbor day.


1 comment:
Excellent job.
Are you able to create a point marker style using these Multiview Objects (MVBlocks)? I have a point group which contains survey points of only trees. I'm unable to assign a style of 3D trees to this point group. Any thoughts? Thanks.
Post a Comment